POPOMETER
Be fast like never before
POPOMETER is the ultimate tool for simracers to compare their driving data with professional drivers. Start today and improve your lap times now.
RegisterSign in with Steam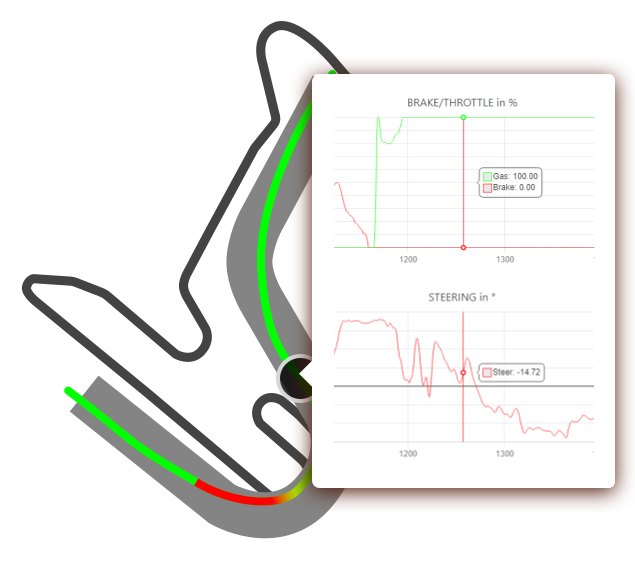
Powerful tool
Data does not lie. Popometer reveals and highlights the differences in driving style that gain the Pros lap time in every situation.
Data Comparison
By plotting your driving data against a professional in charts and track maps, every tiny difference is exposed.
Setups & Bundles
To ensure data is comparable, you will always get the exact same setup and weather condition as the pro driver.
Advancaed Telemetry
Additional data channels allow deeper analysis to enhance driving, setup and race preparation.
Teams
Easily share and compare data within your team to improve together.
Coaching
Soon you'll be able to receive and conduct coaching using Popometer.
Assisted Analysis
Automatically Popometer will find and show key differences like apex and slowest point in the corner.
Detailed analysis and comparison
Small differences have huge impact in racing. Being just 1% slower often means starting from the back. Popometer reveals the details you need to improve.
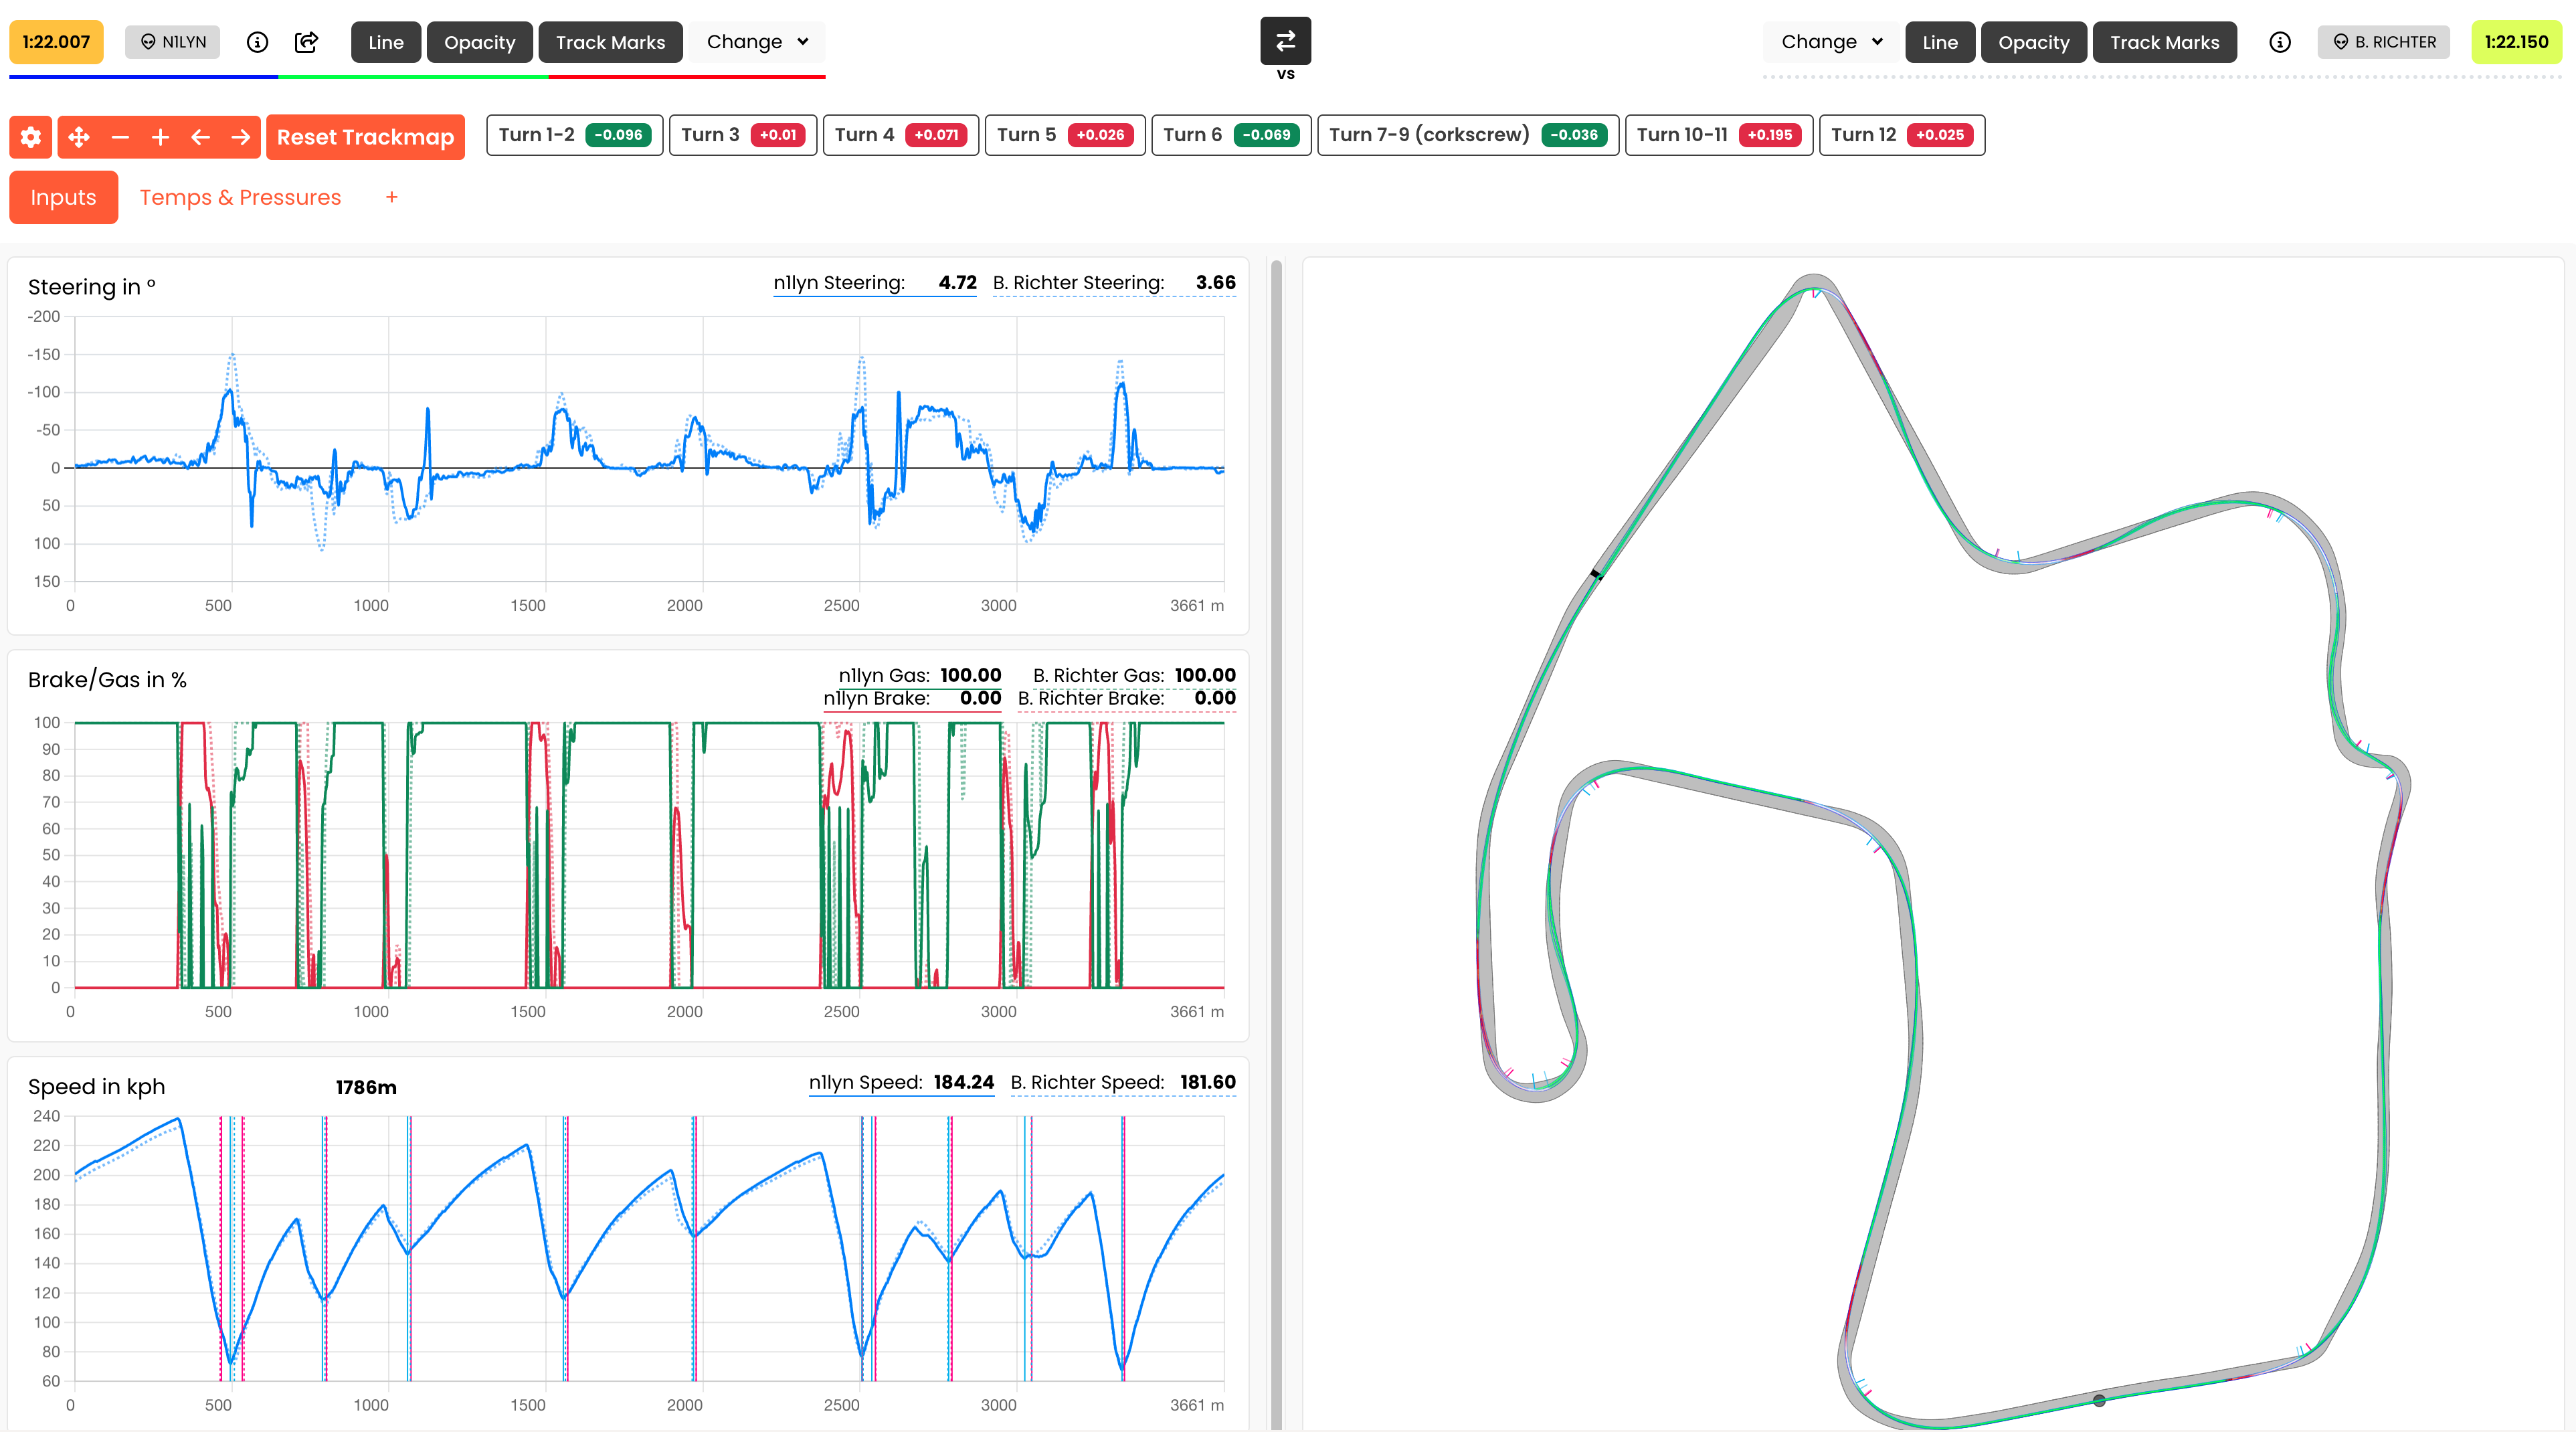
Inputs & Timing
Learn where, when and how pros are using their inputs to set world record lap times.
Focus
Quickly see in which corner combinations you are loosing the most time.
Positioning
Learn how the pros are positioning their car to gain time in every corner.
1
Sign up and start recording your laps for free.
2
Find and compare to professional data packs for your car/track combo.
3
Learn about your individual driving patterns you need to address and improve your lap times immediately.
From good to great.
Popometer makes data comparison easy for everyone. Start today and improve as a simracer now.
RegisterSign in with SteamWhat's new
Call for Setup and Data Creators
We are looking for you. If you are nerdy about your favorite sim and know what you are doing in regards to setup as well as having a clean, fast...
New Ultimate Subscription!
One Sub for all your needs Popometer.io now offers the ultimate subscription, which gives you 15 monthly data pack activations of any game. For as...
Simracing Black Week 2024, here's a quick overview
Black Week starting and there are many offers around. When you are considering any purchases during black week, we have a few things to promote...