Track Guide Snetterton
It's Snetterton as Lowfuelmotorsport's main series this week. So paired with the already public video guide (Deutsch) here's a written version!
It's also the perfect opportunity to get started with Popometer.io because there is a free BMW M4 Data Pack that you can access without any paywall!
Generally, Snetterton consists of slow and tight corners, the track isnt very wide and rather slippery and bumpy - in short: Challenging.
There's barely a straight and in any GT3 you will run all the downforce the car can generate without becoming too instable (we'll see later why).
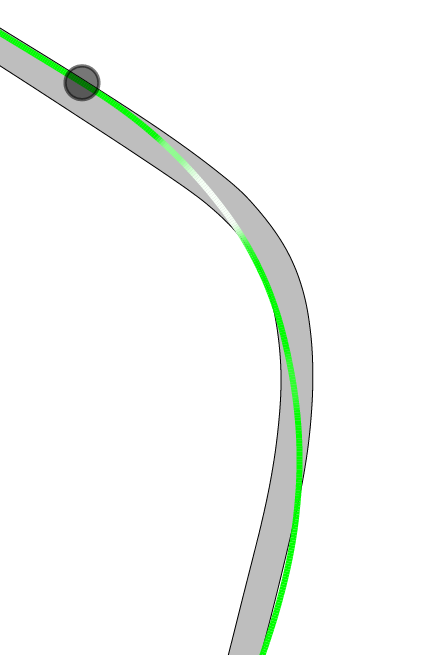
T1:
Turn 1 has a very short braking zone, hitting 100% only for a fraction of a second before the trailing takes over. High downforce at rather high speed here, which means the car is pitch sensitive on the brake, which is why your brake foot controls how much rotation you get (more brake -> more pitch -> more ration). You could say it's in fact two corners. with an almost invisible straight in between. However, you'll clip the first apex where you will also be the slowest. Once you notice making the first exit, you will need to slam the throttle aggressivbely, run wide a bit and this should result in keeping the rotation going and bringing you back for a 2nd apex at the end of this opening corner.
T2: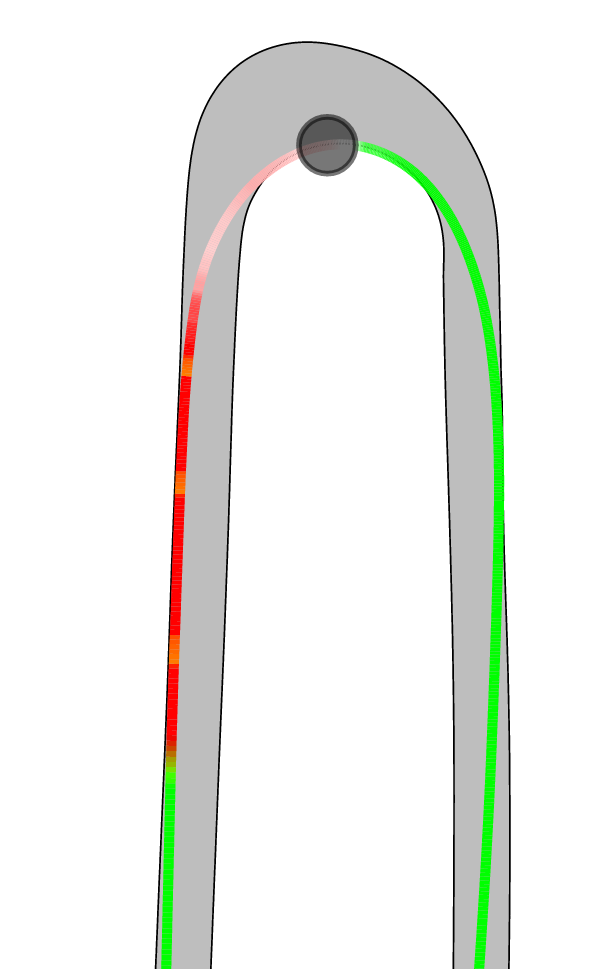
Several approaches are viable here: A single late apex, a traditional centered apex or even a slight double apex approach. Personally I prefer to focus on having a straight car for the exit to aid traction, which means having a late apex or double apex. Important to trail carefully here on the brakes as the lack of downforce at that speed reduces grip quite noticably.
T3
Turn 3 sees the slowest point of the corner around one third into the corner and you can see that again the brake is used carefully and never hitting 100%, as you have to turn in right away. Also again the hard throttle should keep the rotation going and bring the car closer to the inside for an eventual apex roughly two thirds into the corner. The exit kerb works, but is insanely bumpy - take care.
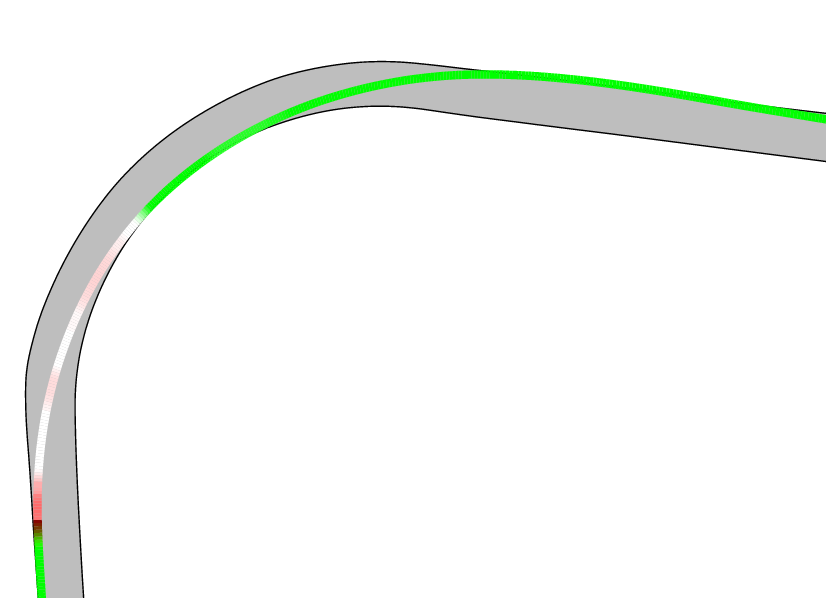
Turn 4 is literally turn 2 mirrored and we'll skip that one :D
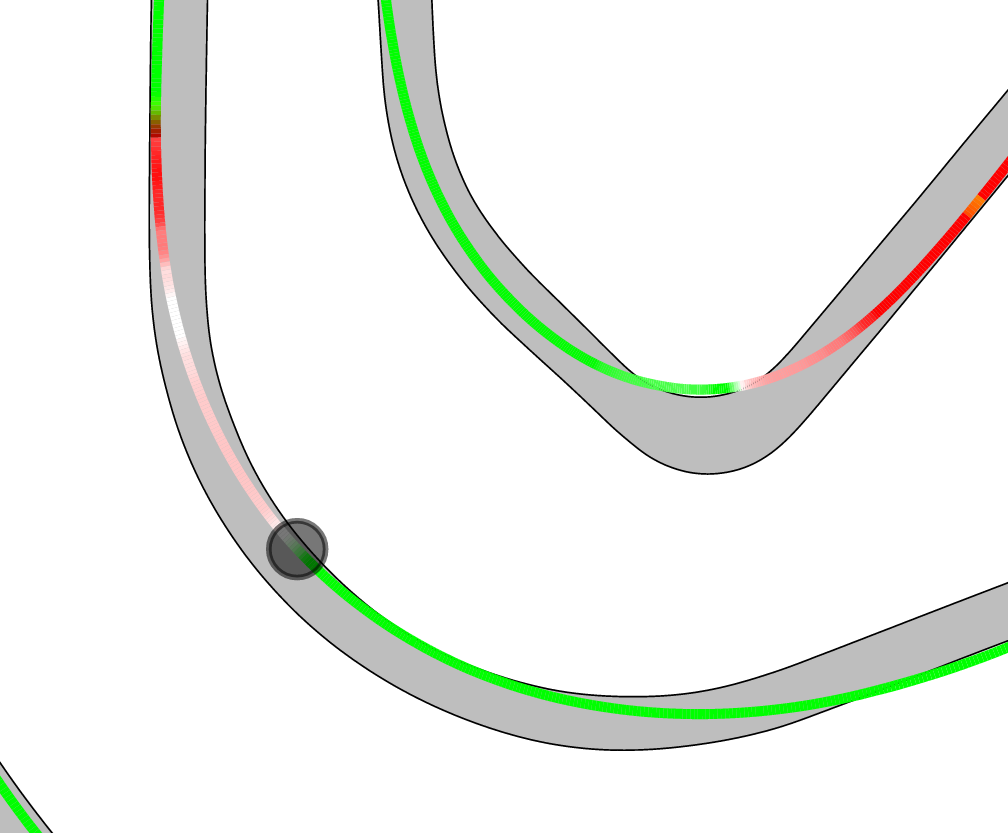
T5: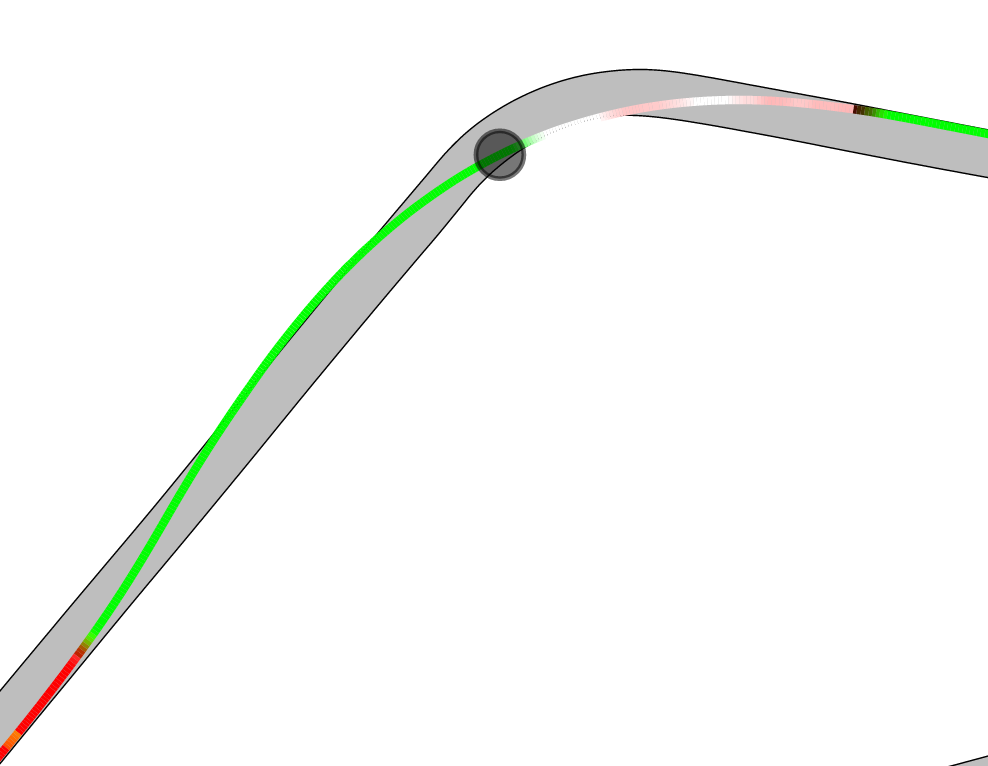
Turn 5 only needs the tiniest of braking to reduce some speed. It's crucial to turn in right away in sync with the brake, which leads to a sensitive car. However the easier you are on the brake, the more in control you will be. If you are too hard on the brake you will get either under or oversteer and will always have to react - we want to be active, not reactive.
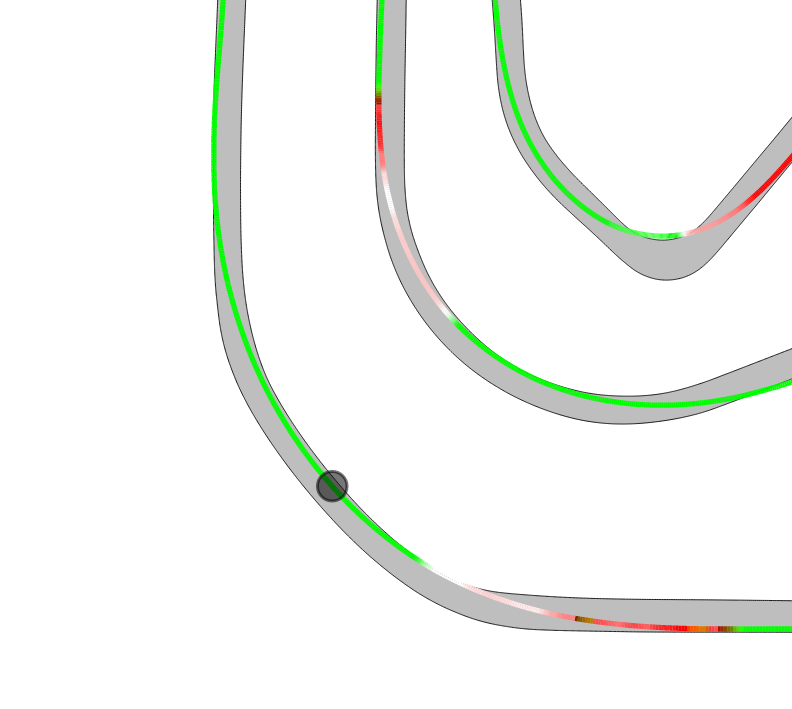
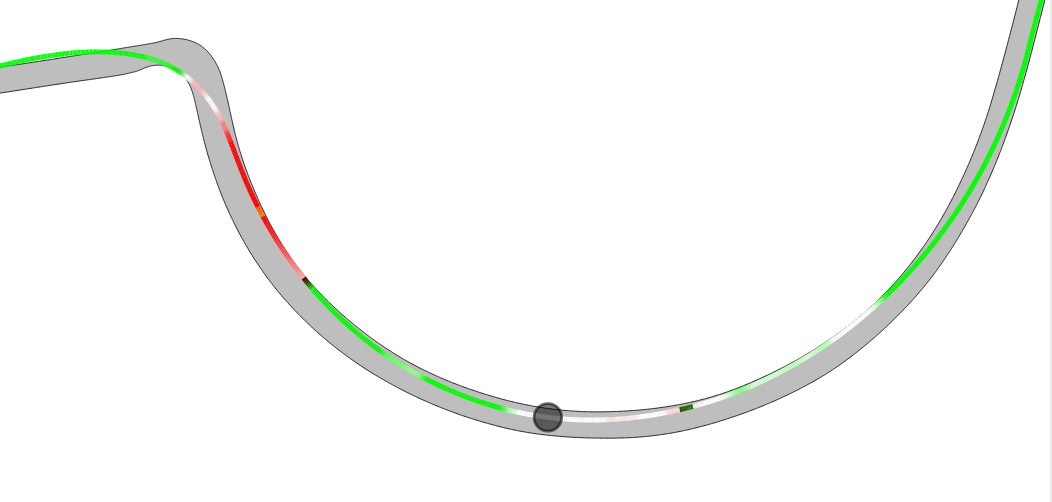
T6-7: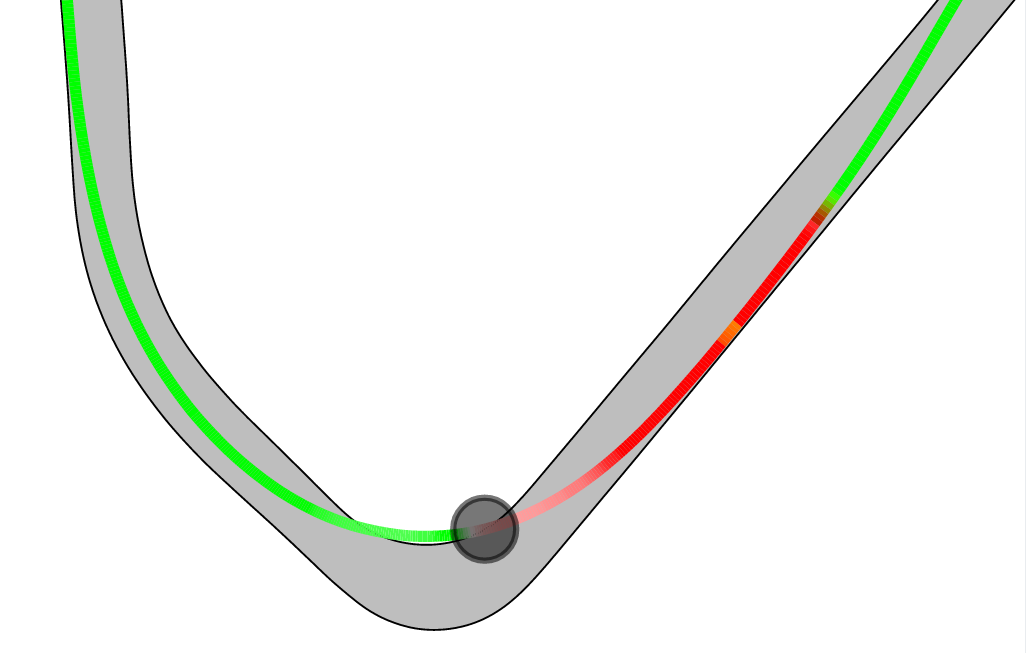
Turn 6/7 are interesting. First you need to reposition and swing across after turn 5 really quickly to straighten up before braking. Again careful trailing as always once you start turning in and hand over the grip to the steering. You can use a lot of kerb on the inside but throttle application needs a bit more care this time as the corner is still lasting for a while with the tightening turn 7 and the track is just not that grippy. Its useful to not go fully wide after 6 and only do so once you exit 7 - there's simply more grip further to the middle.
T8:
Again tricky corner as the speed you approach it depends on your T6/7 exit, which can lead to furhter inconsistencies. Either way, there will hardly be much braking needed. Just a quick dash on the brake and then almost roll into the corner with only tiny corrections further reducing the speed (or keeping it up with tiny throttle inputs). The slowest point should be pretty much in the middle of the corner, while the apex comes rather late to have a straighter car for the exit and good traction. Throttle can be quite blunt in the middle of the turn, for the car to rotation on power through the late apex.
T9-10: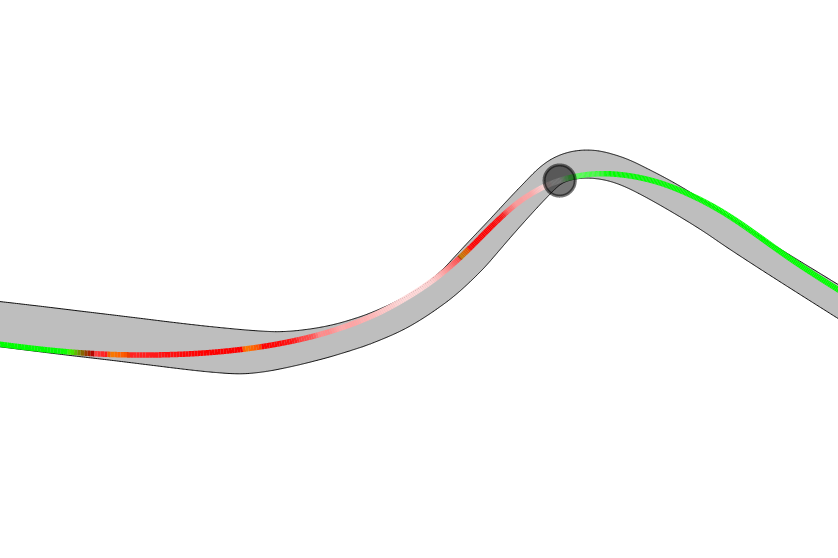 You hate that corner, right? Let's make you love it. The key here is to have only ONE uninterrupted braking zone. The car behaves a certain way on the brake as you trail off, leading to pitch while cornering and a lose rear end. In order to not have various car behaviors we always want to be braking - this way the car always pitches forward and your brake foot controls how much oversteer you want. If you let go off the brake and then brake again, you get several behavior changes which will make the corner harder to predict and more inconsistent. Aim to keep it tight through the left hander - the exit of the right yields a lot of time if you focus to build speed there. Going shallow into T10 means being punted pretty much as usually people behind you underestimate how slow you will become.
T11:
You don't really need to brake here. Just letting go off the throttle ever so slightly will be enough to get the car to rotate and slow down. Once on the inside kerb you can full throttle it again - the corner opens up with rather wide kerb - but they are bumpy. The less steering angle you will need on the kerb the better.
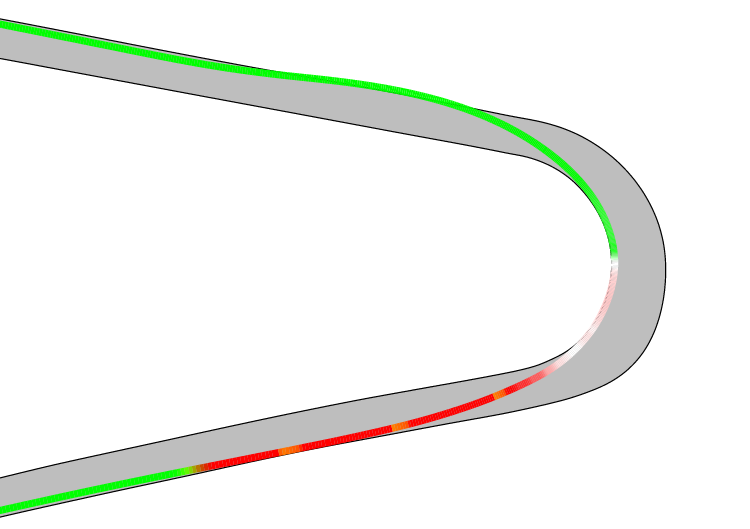
T12-13:
A brutal corner combo. You can throw the front engine cars in quite aggressively, while still being on full throttle. Only once you make it to the inside let go off the throttle and adjust from there. You can carry quite high speed for quite some time and let the car run wide roughly until the center off the track, where you want to have the speed reduced enough, to come back to the inside will full throttle applied. You can see the double apex approach - which is important to be able to brake in a slightly straighter or even fully straight line for the last corner. The straighter the car, the more in control you will be. Depending on the car it can be beneficial not just outright slamming the brake, but giving the car a few tenths to get to 100%. This way you will still rotate on the brake for a bit, before it becomes rather understeery in the heavy braking. Once out of position it will be hard to adjust - so really aim to get this part right and the exit of the last corner will come all on its own.
Enjoy! :)